What Does Bleed Mean in Graphic Design?
Bleed in graphic design refers to the area of a design that goes beyond the actual size of the page. It ensures that when the printed material is cut to its final size, there are no unprinted edges or white borders on the final product.
Imagine you are designing a poster that has a red background. If the red background ends exactly at the edge of the page, and the printer cuts slightly off by even 1mm, it may leave a thin white line on one edge. This is because printing machines are not always 100% accurate when cutting. Bleed helps prevent this issue by allowing the design to extend slightly beyond the actual cut line.
So, in short:
Bleed = extra margin around your design that gets trimmed off after printing.
How Much Bleed Is Required?
Most printing companies require 3mm (0.125 inches) of bleed on all sides of the document. That means if your final document size is A4 (210mm x 297mm), you should make your canvas size 216mm x 303mm, adding 3mm on each side.
Here’s a quick table to understand bleed requirements:
| Final Document Size | Bleed Per Side | Total Canvas Size |
|---|---|---|
| 210mm x 297mm (A4) | 3mm each side | 216mm x 303mm |
| 5in x 7in Postcard | 0.125in | 5.25in x 7.25in |
| Business Card (3.5in x 2in) | 0.125in | 3.75in x 2.25in |
Note: Always confirm with your printer. Some printing companies may ask for 5mm bleed or more.
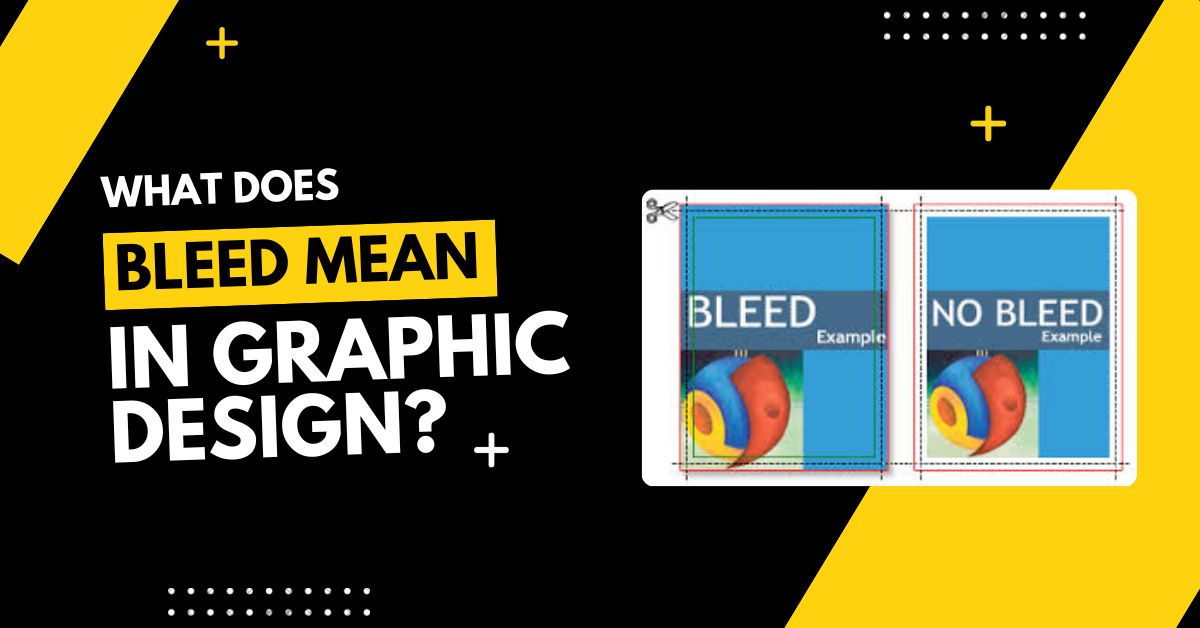
What Is the Difference Between Bleed, Trim, and Safe Area?
This is another common area of confusion. These are three different zones in a print layout.
- Bleed Area: The area that extends beyond the trim line. It gets cut off.
- Trim Line: The final size of the printed piece. This is where the cut will happen.
- Safe Zone: A smaller area inside the trim line. Keep all important elements (text, logos) within this zone to ensure they are not cut off.
Here’s how you can visualize it:
cssCopyEdit[ BLEED AREA ]    <- Background extends here
[  TRIM LINE  ]   <- Page is cut here
[ SAFE ZONE ]     <- Important text/logos stay here

How to Add Bleed in Design Software
Most professional design software allows you to set bleed easily.
In Adobe Illustrator
- Go to
File > New - Set your document size
- Click on “Bleed” and enter 3mm or 0.125in
- You will see a red line around your artboard—that’s your bleed
In Adobe InDesign
- File > New > Document
- Check “Bleed and Slug”
- Enter bleed values (e.g., 3mm)
- Design past the red line to include bleed
In Canva
- Canva doesn’t offer automatic bleed lines in free accounts, but you can add a margin manually
- When downloading, choose “PDF Print” and check “Crop marks and bleed”
How to Export with Bleed
Once your design is complete, exporting it correctly is just as important.
In Illustrator or InDesign:
- File > Export > Adobe PDF (Print)
- In the “Marks and Bleeds” section, check:
- “Trim Marks”
- “Use Document Bleed Settings”
This ensures that the printer sees exactly where to cut and what to print.
Final Thoughts
Bleed might seem like a small technical thing in graphic design, but it makes a big difference in your final printed product. It ensures your design looks clean, professional, and free from unwanted white borders. Whether you’re designing a business card or a large poster, always include bleed if your work is going to be printed.
Also Read:
- What Should a Graphic Design Intellectual Property Agreement Include?
- Is Brand Design Under Graphic Design?
Frequently Asked Questions
What does bleed mean in graphic design?
Bleed in graphic design means the extra area that goes beyond the edge of the design. It’s used to make sure that the final printed material has no white edges. Bleed is trimmed off, but it helps in getting a clean, full-color edge after cutting.
Why is bleed important in printing work?
Bleed is important because printers may cut slightly off. Without bleed, you might see white lines or edges in the final print. Bleed makes sure your design extends beyond the cut, so your design looks neat and professional without any unwanted white space.
How much bleed should I add in designs?
Most printing companies ask for a 3mm or 0.125-inch bleed on all sides of your design. This small margin gives enough space for cutting errors and helps ensure the colors or background go all the way to the edge after trimming the final piece.
What is the difference between bleed and trim?
Bleed is the part that gets cut off. Trim is the final size of your printed material. Anything outside the trim line (in the bleed area) is removed. Designers also keep important text inside the “safe zone,” which is a little inside the trim area.
Do I need bleed for digital designs too?
No, bleed is not required for digital designs like social media posts or website banners because there is no physical cutting involved. Bleed is only needed when the design is going to be printed, such as for brochures, flyers, or business cards.